Showing posts with label Cosplay Update. Show all posts

Tuesday, January 17, 2012

Amano Yuna Version 2 – Beading 2

Woot!  More Amano Yuna beading progress!  I'm about a fifth of the way done if not a bit more.  It's been about a week and a half since I started and if I keep this pace the obi band will be done in time for Sakura Con.  I really hope I get the bow beaded too, especially with the rest of the projects I'm planning. 

Amano Yuna Beading 2

(I apologize for the crappy picture.  The camera hates most indoor lighting.  If it gets warm enough, I'll take a few pictures in the sun once I get a bit more done.)

Friday, January 6, 2012

Finally, A Progress Update

An hour of sketching the other day finalized my design for Amano Aerith.  I loosely based my design off these two images. 

I am really happy with the way my design turned out and can’t wait to start working on it.  Pink, white, red, and possibly gold are the color scheme.  The design is very pretty and elegant almost like something  princess would wear.  I think I have most of the fabric for it in my fabric bin, but I will wait till tomorrow to dig it out since I have other projects I need to finish first. 
Speaking of which, the beading for my Amano Yuna obi belt is going really well.  I found that beading four to five seed beads at a time produces a nice result and doesn’t take as long as the painstaking process of beading each individual bead.  I cannot wait to see the finished result.  I took a quick picture of my progress.  I am so happy with how it looks. 

Thursday, January 5, 2012

Influx of Amano Based Cosplays

The Amano bug has caught me again.  I currently have at least three, possibly four or five, Amano cosplays either planned or in progress.  I'll be redoing my Amano Yuna to look more like these artwork pieces.
 I’m using a darker color scheme for her, mostly blues and blacks and silvers, to play off her name meaning moon.  In addition, I’m using a flowy design to match the above artwork and logo for Final Fantasy X, and I’ll be incorporating numerous hibiscus motifs in the design as well.  I might post a picture of the design later.  I'm really excited to start working on her.  So far I have most of the beads as well as the shirt and materials for the skirt and trims.  I'm so excited!!!

Another Amano cosplay I have in the works is Young Rydia.  I'm really excited to cosplay the little summoner from Final Fantasy 4 as she is a longtime favorite of mine.  I’m using a number of references for her design (see below) as I have yet to draw a final design of my own.  I feel like I’m a kid in a candy store who is constantly pulling wants of the selves to add to the looming pile of candy within the cart when it comes to this cosplay.  I just can’t decide on a final design because I keep adding to the concept in my head.  If I finalize a design, I’ll post it along with my Yuna design (and subsequent amano based designs) if I get the nerve to post my designs online.  Until then here are the references I’m using. 
 
Back to cosplay…I’m using a variety of fun colors intermixed with earthier tones to add a youthful yet refined feel to her design while keeping with the overall feel that she is from a place called Mist.  The colors range from deep purple to bright pink to subtle orange and gold with a wide range of intermixed greens.  I have most of the fabrics and beads in possession with the wig on the way.  The only major pieces of the cosplay I’m yet missing are the shoes.  I have yet to find a pair that fit my ideal concept and may resort to making the desired pair if one is not found. 

Third on my rather quickly increasing list is Serah Farron from Final Fantasy XIII.  She is my favorite character from FF XIII and one of my favorite FF characters.  I’m doing an Amano version of her because I love the piece Amano did of Snow and her watching the fireworks. 

I don’t have a sketch of my design for her yet, but I know the color scheme.  I often have colors worked out before designs.  I’m using a slightly different palette from her original design, pinks and blues and whites, maybe a red, instead of whites and pinks and reds and blacks.  The design on the other hand is going to be quite different while recognizable.  I’ll post more on her as the costume progresses. 

The final two cosplays on my current Amano list are Porom from Final Fantasy IV and possibly Aerith from Final Fantasy VII.  I love Porom’s design and want to play off her amano artwork while possibly incorporating her sprite design.  I have yet to design most of this cosplay.  Aerith, on the other hand, is a longtime favorite of mine.  I have wanted to cosplay since I started cosplaying (there’s even a post or two on her in the back files of this blog), but I have never completely decided on a version of her I want to do.  Since she is a very popular character to cosplay, I want my rendition of her to stand out from the others that litter cosplay sites everywhere.  Not that it’s a bad thing, she is an awesome character, it’s just hard to stand out among so large a crowd.  Hence, why I’ve been leaning more toward an Amano version.  She is another cosplay I have yet to design or even really think about doing so, but when and if I do I shall post more. 

Sunday, July 24, 2011

Toph Update

The wig is done!!!!  I finally finished Toph’s wig.  ^_^  After three modifications, I finally decided on making her wig closer to how it would be in reality instead of the ostentatiously large bun in the show.  I chose this because as you know funds are almost nonexistent and I only had a black wig, bobby pins, a hair net, and hairspray at my disposal.  Nevertheless, the wig looks fantastic, especially for my second or third wig styling projects.  ^_^  I ma very pleased with how the wig turned out.  It definitely looks like Toph’s hair in more realistic proportions.  Even the bangs, which have been styled and hair sprayed into place for ease of photography, look fantastic!  I am so incredibly happy with it!  *^_^*  I can’t stop smiling enough. 

Needless to say, I am very excited to debut her again in 12 days.  Yep, 12 days till con.  I don’t have much to fix before she’s ready which is a relief.  I ended up not needing to resize the main red part of her outfit, the jumper/shirt/pants thing, and can wear it as is to the con though I might fix up the front of it a bit so the fabric is tighter and not as bunchy looking if I get the chance.  If not, I can always work on it for next time.  I have to fix her over-the-shoulder-thing which shouldn’t take too long.  I originally made it in a matter of minutes so I have to go back and case the seams so the underside has a nice clean finish.  Other than that there’s not much to do except figure out how to make her misconstrued belt thing which shouldn’t be too hard as it’s pretty much thrown together in the first place. 

I do actually have pictures this time!   I was able to use a camera for a brief period of time to take pictures of my projects thus far.  Expect another post or two or three with pictures.  Photo spam time!  (I have to fix the bangs a bit since they curled a bit since I styled it.)

IMG_3903

IMG_3907 

IMG_3906

Thursday, May 19, 2011

Latias Update 3

I am happy to announce that the first part of my Latias cosplay is complete!  The dress is done, and it looks so cute!  ^_^  Eeeeeeee, I’m so happy!  I really wasn’t sure how it would turn out since I heavily modified my base pattern and added a lot of self drafted appliqué pieces to the top, but I am pleased to announce that it looks amazing.  I want so bad to rush outside and get a mini photoshoot, but I can’t since it’s raining and the rest of the cosplay isn’t done yet.  It also doesn’t help that I don’t know where my camera is.  >_<

I only have a few more things to make now before I’m completely finished with this cosplay.  I still have to make two armbands, make the visor and head wings, paint the visor, maybe dye and finish the wings if I have time, possibly paint the shoes, and maybe add wings to the back of the shoes.  Sorry I don’t have any pictures.  I lost my camera and don’t have access to another at the moment.  Nevertheless, thank you so much for reading.  ^_^

Saturday, May 14, 2011

Latias Update

It’s less than one day till a local cosplay event, and Latias is about 40% complete.  Yeah, yeah, I know.  I’m not gonna sleep at all today.  >_<  At this moment, the skirt is about halfway done, the shirt is about 25% done, the armbands and the headband haven’t been touched, the wings are at 10% done, and the shoes are bought. 

I found the cutest red shoes at Goodwill the other day.  They’re perfect!!!!!.  They are a light red color with a white wedge heel which will make me look taller and thinner.  Huge bonus there.  Depending on how the wings dye, I might or might not paint the shoes a dark red.  The darker red would fit the general cosplay better, but if the wings turn out too light then I’ll have shoes to help match the color.  Either way they’re a great bargain, especially since I bought them for $1.99!  ^_^  I’m supper happy about the whole find.  ^_^  Time to get back to sewing!  I’ve got a lot to do if I’m going to be ready by tomorrow. 

Thursday, April 14, 2011

Maria Ross Update – It Has Begun

All the hype and excitement from meeting the lady I mentioned in my previous post spurred me to begin working on the pants for my state alchemist uniform on Tuesday.  Since I already had the fabric and thread, I was able to immediately start tracing out the pattern.  I used two commercial patterns for my pants, Butterick 4861 (for the actual pants, I used a lengthened version of view A) and McCalls 6083 (for the pockets since the previous pattern didn’t have the right pockets).  The patterns were easy enough to trace on the fabric and the pants were easy to modify for length and new pockets.  It took me almost 6-7 hours to trace all six pattern pieces and add necessary modifications to three of the pieces (front, back, and cuff).  Time wise it wasn’t bad, but my back hurt afterward. 

On Wednesday, I was able to cut out all the pieces and sew most of the pant pieces together.  It was my first time inserting a frontal zipper with a flap like normal pants have.  I was surprised that it wasn’t as hard as I thought it would be, especially when it came to sewing it in.  I was able to use a sewing machine this time which was really nice.  I usually have a very hard time machine sewing zippers into clothing, but I found out that if I use a regular foot instead of a zipper foot, the zipper will attach better and without much frustration.  It’s a wonderful revelation for me since I’m tired of hand sewing in all my zippers because the zipper foot wouldn’t work. 

I don’t have much left to do before the pants are finished.  I just have to cut out the interfacing for the waistband and cuffs, and attach and sew the interfaced cuffs and waistband to the pants.  The pattern I used for the pants calls for the waistband and cuffs to close with buttons, but I’m not sure if that’s the best choice for me since I’ll be tucking the ends of the pants into my boots and wearing the waistband under the butt-cape/waistcoat thingy’s waistband.  I don’t know how comfortable buttons would be in this case so I’m thinking of using waistband hooks and eyes instead.  I think I’ll go with the hook and eye method for the sake of comfort. 

There is not much else to say about this cosplay at the moment.  I’m still looking for acceptable boots to use.  I was thinking of trying combat or real army boots, but I’m not sure yet.  I’ll have to see if I can find some at a good price.  If not then I’ll settle for boot covers over a pair of black boots I already own.  There are a few more things for the main outfit that I have yet to get as well.  I still don’t have the right bias tape to use (I have dark gray instead of silver gray), buttons for the butt-cape/waistcoat thing, a gold braid and small ring as well as the lapels (I’m getting them embroidered for me since it will cost less than if I embroider it myself) and pins since I can’t cast them out of pewter myself.  Other than that I’m ready to go.  ^_^

Friday, April 8, 2011

New Addition to the Cosplay Family

I’m having another change of plans.  My Kotomi cosplay fell through since I couldn’t get the wig or make the dress due to shortage of funds.  I still want to cosplay her, but I can’t at the moment so I’m replacing her with Luka from Vocaloid.  Luka is one of my favorite vocaloids because I love her voice and graceful style.  I also think her pink hair is adorable. 

I’m planning to do a Just Be Friends version with a curly wig. 

Just be Friends - LukaxKaito

I found a long curly pink wig that I can afford and should arrive before the con.  I already have a white dress and black boots that I could use.  I have to add a lining or two to the dress, but otherwise it’s done.  I’m going for the version she wears in the balloon scene so I don’t have to get or make a wreath.  I’m hoping that one of my friends can come so he can cosplay Luka’s Ex since he looks a lot like him, but I don’t know if my friend can come or not yet.  If not that’s fine, but I really hope he can. 

I also want to wear a silver/gray and black formal to the high society formal the con is hosting.  As far as I can tell the dress would look great with the wig which would be perfect for the formal since it’s curly.  I might style it a bit, but I don’t really know yet.  I’ll know better if I’ll actually be cosplaying Luka for the formal once I get the wig.  I got the dress from a prom dress swap.  It’s really beautiful, and I like it a lot.  I have a couple pairs of black heels that I could wear with it since high heels are required for the event. 

There’s going to a good sized Vocaloid group at the con.  So far it looks like there will be a Len, Miku, Mikou, and maybe a few others.  I can’t remember the exact list unfortunately, but it’s a descent group for a small con.  I’m looking forward to meeting some if not all of the group.  Maybe there will even be a photoshoot which would be lots of fun. 

I’m both excited and nervous about cosplaying Luka.  I’m excited because I like the character for the most part, but I’m nervous since Luka is the sexy type and I am not.  Nevertheless, I like her Just Be Friends version which is sweet, simple, and not over sexualized like some of her other designs. I like the character, but I don’t like all her variations. 

Dresses I’m planning to use: Top and middle, Just Be Friends version dress and boots; bottom, formal version.  The formal has a very beautiful silver to grey gradient, but unfortunately the lighting washes it out in the picture.

IMG_0092

IMG_0754

IMG_0093

Wednesday, April 6, 2011

Wigs, Scissors, and More Wigs

I just ordered wigs for my upcoming cosplays today.  I’m really excited to see how they turn out.  I’m trying out new wig sellers this time to find which ones I want to buy from the most.  So far, I’ve bought wigs from Zepher, Wig Fashion on eBay, and Legend Wigs on eBay. 

This time I’m buying a prestyled Akari/ARIA wig and a short brown wig from C.C.-Kids as well as a long curly pink wig and a long sandy blond wig from a Taobao store of which I don’t know the name (link here both wigs are in the 80-95 cm category).  I’m also getting styling scissors and wax from Fantasy Sheep.  My order should be in around May.  I’ll post a review of the wigs and styling products then. 

I’m very excited to get the wigs and totally stoked that I can get everything for a whopping $76 including shipping!  ^_^  It’s a dream come true for a poor college student like myself who has to eat as well as cosplay.  It’s a total blessing that I was able to find a group to order with so I could get the shipping at a discount price. 

I still have a few more items to get before the con and my homemade cosplays still aren’t done (yay, for procrastination and over excessive homework).  I should be able to get nearly everything now, especially if I save a bit more of my money for cosplaying items, like a con badge (which I still don’t have).  It looks like I’ll be able to get most if not all of my planned cosplays for this con done and acquired on time.  I am a very content and excited cosplayer. 

Tuesday, March 29, 2011

Temari Cosplay Update

I almost have all the pieces of Temari’s first Shipuden outfit.  I’m buying the kimono, obi, headband, netting, and gloves.  I bought a base for her fan and should be receiving it in a week at most.  I still have to order her wig and buy the materials for her shoes since I’m making them myself.  I also have to get a bunch of paint for the fan. 

Thursday, March 24, 2011

Akari Update 7 - Wig

After much searching and price checking and wig hunting, I’ve decided to buy a prestyled wig for Akari.  I found that I can save more time and money if I buy the wig instead of making it myself.  As this is the case, I found a prestyled wig that I can buy from Clarissa-Kids on Ebay and Taobao.  The Taobao wig is less expensive so I’ll be buying it from there, especially since I know a group of people who want to do a batch order to save on shipping.  The wig will cost around $25-$30 USD including shipping.  I’m really about finding this wig as I didn’t want to style it myself.  I’m new to wig styling and Akari’s hair is at least at an intermediate level so I’m really nervous about styling it myself.  I don’t want to ruin a wig and I certainly don’t want to have a mediocre wig especially if I enter this cosplay in a cosplay masquerade. 

Saturday, February 26, 2011

Akari Update 6 – Part 1 Complete

I finished the under dress for Akari Mizunashi’s Summer Uniform today.  So far all looks well.  I’m happy with the way it’s turned out, but I wish I could have done better with the slit and hem.  The slit doesn’t close exactly how I want it to and the hem is a non-traditional bubble hem because I couldn’t get a rolled hem to work with the way I designed the bottom of the dress.  (A bubble hem is a hem that is sewn on the inside of the garment so the bottom of the garment will poof.)  Like with any cosplay I make there are aspects that I’d like to change if I remake the outfit, but overall I am very pleased with it.  For the time, knowledge, and resources I had, I did well. 

PIctures!!!!  Now I have the fuku, glove, shoes, hat, and wig to complete.  ^_^

 HPIM2908 HPIM2905

HPIM2903 HPIM2906

Friday, February 18, 2011

Akari Update 5

I finished the appliqué for the bottom part of the under dress today.  It looks so cool!  The general shape is different then I expected, but I love it nonetheless.  Sadly I don’t have any pictures to share cause I can’t find a camera.  I’ll post pictures of the full under dress as soon as I’m done.  I should be able to find a camera by then. 

It’s almost astonishing that I’m almost done with my project.  I don’t have much left to do.  If I keep at it I should be able to finish the under dress and the fuku, maybe even the hat, by the end of February.  All I have left to do is hem the under dress, finish the slit, prepare and cut out the fuku (which shouldn’t be that hard), cut out and apply the appliqué to the fuku, sew the fuku, make the bow, make the glow, apply the appliqué to the glove, draft and cut out the hat, appliqué the hat, sew the hat, and finish the hat.  Ok, so I have a bit more to do than I thought, but I know I can at least get the under dress and fuku done.  Especially, if school continues to have lax amounts of homework.  I love being able to relax more after last week. 

The hat and glove shouldn’t be that hard though I dread making another glove out of non-stretch fabric.  This time I will include ease.  I’m still having trouble with the last pair of gloves I made.  -_-  Ah well, live and learn to not make the same mistakes again.  I don’t know how to make the gold ring for the glove yet.  I had thought of using craft foam, but I don’t know how well that will work.  I have to get the supplies for the jewel and cast it as well. 

As for the shoes, I might have found a good pair of base shoes, but they’re a bit out of my price range.  I’ll have to keep looking and hope I find the right pair fairly soon.  I only have till mid May to get this and three other cosplays done.  Yes, three.  The con is four days instead of three.  I’m so excited even though I’ll have to sew my heart out for a week or two before the con.  Ah, such is life. 

Thursday, February 17, 2011

Sango Preparation – Weapons and Accessories

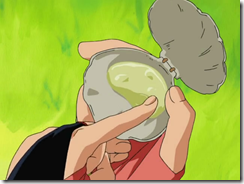
Sango has a lot of accessories.  She has her infamous Hiraikotsu, wakizashi, dagger gauntlet, mask, rope, chain, salve, as well as demon slaying poisons, smoke, and paralyzing salve.  Her Hiraikotsu is carried across her back with a strap fastening while her wakizashi is tucked into her belt on left side.  Theses are the two prominent accessories.  Her lesser known accessories are usually hidden away in her outfit.  Her dagger gauntlet in hidden under her right sleeve.  Her rope is tucked away in her right shoulder armor while her healing ointment/salve is in her left shoulder armor. 

vlcsnap-2010-09-13-04h20m53s21

Sango holding her Hiraikotsu.

vlcsnap-2010-09-19-17h49m16s37

Sango preparing to draw her wakizashi.

vlcsnap-2011-02-18-04h21m21s181

The dagger gauntlet in her right sleeve

vlcsnap-2010-09-13-04h22m19s109 

Sango’s mask flying through the air.

 vlcsnap-2011-01-02-20h12m07s191

Sango preparing to throw her rope.

 vlcsnap-2011-02-18-04h05m40s234

Sango releasing a chain to trip her enemy.
vlcsnap-2011-02-06-04h14m13s227

Sango’s antiseptic ointment in shell case.

I want to make as many accessories as I can.  So far I’m planning to make her Hiraikotsu, wakizashi, dagger gauntlet, mask, rope, and salve/poison containers.  I’d really like to have a working Hiraikotsu.  I’d be so much fun to play with, but I have no idea how to accomplish that task. 

As for the other props, the wakizashi is easy enough.  I just have to find a convincing sword and decorate it, or I can make my own or commission it.  The dagger gauntlet is the same as the wakizashi/sword.  I might commission this one since I want it to be able to spring up.  I’m planning to make the mask out of craft foam, and I can get the rope at a store.  I don’t know where to get the grip yet.  The salve/poison containers aren’t hard either.  They are simple shell cases.  I’d like to use real shells, but I don’t know if that’s going to happen.

I still have to get most of the supplies for her weapons and props.  I’m thinking of commissioning her Hiraikotsu and dagger gauntlet if I can get the money.  I don’t have to have the dagger gauntlet this year, but I’d definitely want to have the Hiraikotsu.  I’ll know in the next month or two if I’ll make the Hiraikotsu or not. 

Friday, February 11, 2011

Sango Preparations – Fabric and Armor

I found the perfect fabric for my Sango cosplay.  It’s a Milliskin Matte (Tricot), Four Way Stretch in black that can be found here.  It’s taken me a long time to find the fabric I wish to use.  I want to get my Sango cosplay as accurate as possible, even with the sheen.  It’s a very hard sheen to match since it changes from picture to picture.  Sometimes it looks like a matte while other times it looks like a gloss.  Personally I like the matte look better.  It won’t glare so much and will have a better effect in photos.  I’m going to send in for a test swatch of my top three fabric choices to double check my decision.  I’ll the fabric know for sure in about a week or two hopefully.

Now that I’ve found the fabric, I have to focus on the rest of the cosplay. I intend to use the same fabric for her boots as the leotard so I just have to get souls for the boots.  As for armor, I’m thinking of using pink vinyl atop craft foam.  Craft foam is easy to use as well as inexpensive while vinyl should have the right feel and look to it.  I don’t know what I’m going to do for the silver/gray edging around the armor yet, but I’ll figure that out as time goes on. 

I haven’t decided what fabric to use for her ties and collar edging.  I was thinking of using red satin or silk, but I haven’t priced that idea yet.  I also need to get the pattern for the leotard.   Overall, I think the pattern is going to cost the most.  I’m planning to use Kwik Sew 3052 as my base pattern.  Kwik Sew patterns almost never go on sale and cost at least $9 for one pattern.  Yikes!  The pattern is worth it though because I can use it for other spandex related projects in the future.

Progress Pictures

I decided to post my current progress pictures in one post so you could see what I’m currently working on.  Every time I get a lot of progress done I’m going to make a recap post like this one.  That way you can easily see where I am with my cosplays.  Enjoy!

First I’ll start off with Vorfeed.  I’m putting her at 50-55% complete.  So far her dress and gloves are done.  I still have to make the shoes and cape.  I also have to style the wig and cast the gems.  I need to get supplies for her forehead markings and neckband.

IMAG0515 IMAG0516

 IMAG0517IMAG0520

IMAG0542IMAG0544 

My other current project is Akari.  She right between 45 and 50% complete.  I already have the first part of the dress done.  I have yet to finish the second part of the dress and make the fuku, shoes, and glove.  I have to style the wig too.

IMAG0512 IMAG0513

IMAG0534IMAG0536

Saturday, February 5, 2011

Akari Update 4

I finished the first part of the under dress today.  The lining is in place along with the zipper.  Now all I have left to do is make and attach the appliqué for the bottom of the dress and finish the slit.  I cut the dress too short originally so I have to make up for it by adding fabric to the bottom.  I’m actually pleased that I have to add the add the extra fabric.  Though it decreases the accuracy of the cosplay, it makes it easier to attach the bottom appliqué. 

I’m really happy with the way the dress is coming along.  So far it’s the most accurate cosplay I’ve made.  I love it already!  The dress fits wonderfully.  It’s a bit tight in the hips, but I can live.  I only had to fit it once this time, which is a first.  Usually it takes me three or more times to get the dress or garment to fit correctly.   This cosplay has a bunch of firsts woven into it.  It was my first appliqué project, my first zipper that turned out well, my first easy fitting project, my first total modification project, and my first time working with a vented slit.  I’m so happy with it!  I’ve learned so much so far!  I can’t wait to see what else I learn before it’s complete. 

I have a couple pictures to share.  Enjoy!

IMAG0512 IMAG0513

IMAG0514

Wednesday, February 2, 2011

Akari Update 3

IT’S HERE!!!!!!  My wig came in the mail today.  It’s a beautiful milkshake pink wig from WigFashion on eBay.  I love it!  The fibers are so soft and the color looks good on me.  The pink even slightly clashes with the blue appliqué just like in the anime.  I also got a pair of extensions with the wig.  Sadly they are blue instead of pink.  I’m going to contact the wig seller to see if I can trade the extensions.  If not then I’ll put them up for sale. 

Nevertheless, I’m really happy with the wig.  I can’t wait to wear it!  I’m even tempted to wear it to school, but I don’t want to cause a ruckus.  Oh!  I also got a free wig cap with the wig.  It’s a nice mesh cap that holds the wig on well. 

I have some pictures of the wig!  Isn’t it beautiful?! 

IMAG0534 IMAG0535

 IMAG0536

Friday, January 28, 2011

Akari Update 2

Appliqué is a long and tiring process though it leaves great results.  I recently finished the appliqué for Akari’s under dress.  It was a task and a challenge all in itself.  Making the appliqué took 4½ hours while applying it and sewing it on took a couple hours at most.  The hardest parts were drawing the appliqué and sewing it on.  Sewing curves on an appliqué is a huge pain.  The stitching isn’t perfect, but I love it just the same.  I’m really happy with the way it turned out too.  The design looks perfect!  I’m really happy with how the outfit is coming along.

I have a couple progress pictures to share.  Enjoy!

Drawing out the pattern for the applique The finished drawing of the Aria Company appliqué before I cut it out.  I drew it on with quilter’s chalk.  Drawing the center oval took the longest because I had to place it just right while keeping the right shape. 

IMAG0424The Aria Company appliqué after I attached it to the front of the under dress with Heat ‘N Bond.  That stuff is a life saver.  It’s totally amazing!  It took me forever to get the oval perfectly centered.

Sunday, January 16, 2011

Akari Mizunashi Update 1

Cosplays always take me longer than I expect to complete.  I’ve been working on Akari for the past few days, and I’m still in a relatively beginning stage.  Granted, I have accomplished some minor progress.  So far my cosplay construction has been more of a hit-and-miss training session than an easy pattern modification.  I’ve learned a lot about what not to do when it comes to sizing, scaling, and design/pattern moding.  Hehe…well I know what not to do, for this project at least.

It’s taken me three tries thus far (I’m currently on my third) to get the dress pattern to work and look right.  There’s a big difference between a cosplay looking right and working right.  Why nearly every anime/video game outfit defies the laws of gravity and physics I will never know.  It sure makes the outfits hard to recreate perfectly.  Even near perfection is difficult.  Nevertheless, the reward of a near perfect cosplay is what motivates me to pursue my hobby.  Pretty soon it won’t be too hard to recreate cosplays that nearly defy the laws of both gravity and physics. 

I have some progress pictures to share as well.  So far I have the main part of the dress almost worked out.  I cut the original piece too short so I have to add a bottom piece.  My current bottom pieces need to be redone too.  I cut them at an angle that slopes the wrong way.  -_-

Pictures!!!!!

Front

I’m making it as two separate pieces with a vent to get the slit right.

IMAG0403

Back

I’m making two separate pieces because I don’t know how to make the zipper work without the back seam.

IMAG0405